Saturday, February 20, 2016
Sewing For Me and Sharing The Love
I don't make New Year's resolutions because I would never keep them. However, I did decide that 2016 is going to be a year that I am going to sew for myself and my family by making fun things. Designing patterns is and has always been my passion and I'm so lucky to be able to make my living doing so. Back in 1993 when I had my first design published in a magazine this was my dream, and now with the Internet, it is happening.
Since starting my business, I forgot what it was like to sew strictly for enjoyment. No taking photos of progress, no jotting down notes, no making prototypes, and no need for pattern testers. It's all about relaxing and fun sewing. It is so rewarding!
When I say "Sharing the Love" I mean that in two ways. First, all the little gifts and things I'm making for family, and second, showing off my creations from other designer's patterns. Yes, I purchase patterns from other designers, and follow their blog tutorials too!
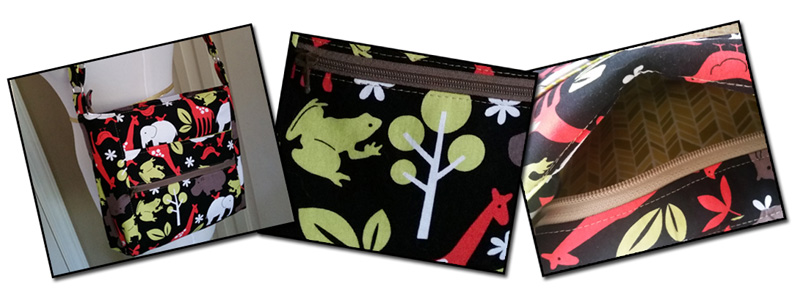
Most recently I created the items you see in the photo. The Bionic Gear Bag is probably one of the most creative and unique things I've ever seen! As soon as I saw it I knew I needed a couple of them. I made one to keep my everyday sewing supplies in, and another to store my electronic gear such as my point and shoot camera, spare batteries, chargers, flash drives, etc. There's even room in there to stash some of my favorite teas, and other things I'll need when traveling. After I made mine, I made one small adjustment to the pattern (changed up the front tray) and made one for both of my moms. I have a couple more in the works. I hope my family isn't reading this post.
I also whipped up these simple potholders that I found on Stitching With 2 Strings blog. My poor old things were actually wearing so badly that I was burning my hands. These could not have been any easier or quicker. It took more time to choose the fabrics than it did assemble them! I'll be making more, and I'll be making some smaller ones to use as coasters. My folded paper towel on my stone coaster isn't very pretty.
I made up a whole bunch of these little earbud cases or coin purses and gave them to the ladies in my family on a recent trip to the Smokey Mountains.
I don't even know where to begin with all the little snack bags, zipper bags, and other little bags I've been making. As for wristlets, I just listed one and yet I'm still making more. My daughter claimed one of them so I made another one exactly the same, then I thought, I really need more of these!
I spent one day making some cute and personalized labels for my personal and business projects. They came out so cute that I shared them with the So Sew Easy website. You can find the tutorial to make your own right HERE.
BTW....I often find the need for pattern testers. If you would like to be one of my testers, just click the link at the top of the page that says Pattern Testers, or click HERE. I'll be needing them again soon!
Friday, February 12, 2016
YES! You CAN Make Your Own Sewing Labels!
I am so excited about my most recent article and tutorial at So Sew Easy! I spent an entire day making lots of labels to test out the different techniques and I share them all with you in this article. These are so fun and easy to make, you'll wonder why you never made the before. If you have a business or you enjoy making gifts for friends and family, you can make awesome and personalized labels. You work hard on your projects, take it to the next level and give it the label it deserves! I will show you how right HERE!
Tuesday, February 2, 2016
Paige Bag Pattern - Thank You to My Pattern Testers!
When I put a call out for pattern testers, I got an overwhelming response. Not only were there a lot of them, it seems as though I got the best of the best! They were asked to make this purse, or wristlet, or both. They gave me great advice and found all my typos and boo boos. The pattern they were testing is for my Paige Crossbody Hipster Bag and matching Paige Wristlet or Cellphone Case. They certainly didn't disappoint!
Maxine used two different nurse themed fabrics to create her purse and wristlet. Love this theme, in fact, I can think of several people who would love these bags!
Sally chose this cute purse themed fabric. She also added a cute little purse charm on the front zipper. Be sure to stop by her blog and shop http://www.sallysaidsew.com.
Jen's purse is made up of this bright and colorful animal print. I'm loving the colors she chose for her zippers. She is going to be in full purse fashion when she's on various outings with the family!
Rose chose this soft print fabric in greens and golds. Love the way the purse matches the wristlet. It makes me think of spring!
Janet used this bright and cheerful deep pink, green, gold, and white fabric. Another fun color combination!
Lorraine went with this very sophisticated print. I just love the contrast of the lining fabric with the exterior of the bag.
Alex created her bag from this awesome big leaf fabric. The contrast of the browns and tans against the white background is stunning!
Trish went completely fun and colorful with the fishies on the purse (I say fishies because it's my two year old granddaughter's favorite thing), and the LOVE themed wristlet. Be sure to follow her on instagram https://www.instagram.com/trishhfly/ where you can see all her great projects.
Celia's purse is full of pretty wildflowers. I love the pink and blue accents, and those sunglasses too! I notice she uses decorative stitches for her top stitching. I really need to try that on some of my bags. So creative and clever! You can visit her facebook page at https://www.facebook.com/SerendipityHandbags and see all the fun bags she makes.
Donna completed both bags from this super hero fabric. Who doesn't love and appreciate Wonder Woman? I love the use of the black hardware. It's a perfect match for these bags!
Shanna used this pretty floral print on both of her bags. Great colors and the lining is perfect! Definitely makes me think of spring! Stop by her facebook page and look at all the bags she's been busy making https://www.facebook.com/ifISAYsew
Thanks again to all my talented testers. Your time is so much appreciated. If any of my readers would be interested in becoming a pattern tester for future patterns, stop by my website for information.
If you'd like to make these bags for yourself, you can find them at my Craftsy Shop and my Etsy Shop.
For the first 48 hours, they can be purchased for a special introductory price. On Thursday night (Feb 4th, 2016, Chicago timezone) they will go up to their everyday price.
Wednesday, December 30, 2015
Sewing Essentials - My Favorite Studio Supplies
As many of you already know, a few months ago I joined forces with So Sew Easy, and it's been a fun and educational experience. Before that I would stop by the site now and then, but now that I've become a part of it (actually a contributor), I've had many opportunities to really look it over. There so many free tutorials, tips, and a crazy amount of sewing information!
Today I'm sharing a list of my favorite sewing essentials. Some of them you may already have, and some, you may not know yet that you really need. Stop by So Sew Easy and take a look. I gotta warn you, you might just be sitting at the computer all day looking through all the fun stuff!
Wednesday, November 25, 2015
Handmade Holiday!
Many of my blogging friends know how special a handmade holiday can be. I've been guest writing over at So Sew Easy and my most recent article is about just that. Be sure stop by and get some great ideas. Click HERE to find out how you can add more handmade to your holiday!
Friday, October 16, 2015
Share Your Talents for a Cause
Every year I like to participate in some type of sewing for a cause, and I'm looking forward to doing it again! I did some research so I could find something for this year. I've found a ton of them. I got such joy last year knowing that the little monster pillow toys I stitched up would make a couple children smile.
I've been so blessed in my life in so many ways, and I really want to give back. It's been a rough year for our family and I'm now moving in more of a positive direction, and trying to become a better version of myself. Donating and helping others is a win/win. Not only are you helping someone who needs it, it makes you feel really good!
Here are a few that I've found and I'm just trying to decide which one I'm going to do this year.
Make a fun and colorful pillowcase for a child fighting cancer:
Make a snuggly blanket for an animal who needs a little comfort:
More animal snuggle love:
Sew or crochet a blanket for a child who needs one:
There are just so many great charities out there. You are just going to have to find one that works well for you and your talents. Whatever charity you choose, just be sure to check it out carefully. You want to make sure the money or items are going where they should. It really does make your heart feel good!
Don't forget, you can share the love all year long, not just at Christmas.
Saturday, September 26, 2015
A Week in the Smokies
We just returned home from spending a week in a cabin in the Smoky Mountains. Our family has had such a rough year that it was so nice to kick back and enjoy our surroundings. No work, no bills, no television, no daily humdrum. Of course our cabin had a TV, free WiFi, and cell service, but we really didn't use much of it. The only TV shows we had on were Mickey Mouse for my granddaughter, but even then, it was just a couple times. We spent the days doing touristy things, then we returned home to our cabin for quick and easy dinners, relaxation, hot tub fun, and lots of laughs. We even went for a celebration anniversary dinner on the last night there. There were a total of eight adults and my two year old granddaughter. What fun!
Tuesday, September 15, 2015
Scrap Buster - Earbud Case or Tiny Coin Purse Tutorial
There are a gazillion zipper bag tutorials out there and I have made many of them. When I wanted one to fit my earbuds, I couldn't quite find exactly what I wanted. I wanted it to be the perfect size to fit my earbuds. I don't like to over clutter my purse, I wanted something flat, and I wanted a ring attached so I could have the option to clip it to my purse, key ring, etc. This case is very small but you could also use it for a small coin purse, or as a place to hold your flash drives and extra SD cards. The nice thing about this pattern is that you can easily make it any size you want. Just remember that your zipper must extend at least an inch or an inch and a half past the edges on each side. The finishes size of mine is 3 X 4 inches, and the top stitching around the outer edges takes up some of the inside space, which can be omitted if you prefer. Let's begin!
Supplies to make one zipper bag
Scrap fabric for outside, lining, and optional tab
Scraps of fusible interfacing (I used fusible fleece interfacing)
Thread to match fabric
9 inch or larger zipper
1 inch metal ring (optional)
General sewing supplies such as cutting tools, scissors needles, pin, sewing machine, iron.
Note: If your fabrics will be pre-washed, do not use fabric softener. It can prevent your fusible interfacing from sticking.
Instructions
1. Make a paper template to measure 4 1/4" X 5". Remember that this is a tiny case so if you want yours bigger, this is the time to change the measurements. Just remember that your zipper must be bigger.
Fold the paper template into quarters and round off the corners. Using this template, cut two pieces from the outer fabric, two pieces from the lining fabric, and two pieces from the fusible interfacing. You are also going to cut a piece 2" X 2" fabric piece for the tab if you are going to add the ring.
2. Take one of each of your fabric and interfacing pieces and fold in half lengthwise, then cut down the center. You will now have one whole piece and two half pieces of the outer fabric, the lining, and the interfacing.
3. Iron the fusible interfacing to the backside of each of the outer bag pieces. Be sure to follow the manufacturer's instructions for the interfacing you are using. If any of the interfacing extends beyond the fabric, just trim it away.
4. Fold the optional tab fabric (2" X 2" square) in half, then fold the the two long edges in to meet the fold in the center and iron. Stitch along each folded edge.
5. Sandwich your zipper between one of the outer half fabric pieces and the lining fabric pieces, meeting the long edges. The right sides of the fabric will be facing each other, and the right (top) side of the zipper will be facing the outer bag fabric. Make sure that the two fabric pieces match up evenly, and that the zipper is extending beyond each end. Also, your zipper slider is in the extended area and not between your two fabric pieces.
6. Using your zipper foot, stitch the zipper and fabric pieces together 1/4 inch away from the edges. Flip the fabrics out and away from the zipper, lining them up so they match up, and press. Pin to secure. Take back to the machine and top stitch close to the fold. Repeat these steps with the remaining halves of the fabric by attaching them opposite of these two. Be sure to make them line up with the fabrics that are already stitched.
7. Pull your zipper slider down so that it is a little more than halfway. You will need this opening to turn your case right side out. Trim the ends of the excess zipper pieces away.
8. You will use your multi-purpose foot to stitch the the rest of the case. First, stitch the ends together so that the open ends of the zipper will meet each other. Keep your stitching within 1/4 inch from edge. You don't want the zipper teeth to overlap each other, you want them to meet. and remain flat.
9. If you are using the tab and ring, you will attach that now. Fold the tab in half over the ring and stitch the ends together to secure. Place this piece at the edge that you just stitched closed. Stitch to the edge just under 1/4 inch from the edge.
10. With the right sides facing out, and the interfacing on the inside, pin your large outer fabric piece to your lining fabric piece. Baste around the entire thing just under 1/4 inch from the outer edge.
11. With the outer pieces facing each other, place this piece together with the zippered piece. You will notice that the fabric making up the bottom of the case is slightly bigger than the the zippered piece. That's OK, you'll be cutting it away later. With the zippered piece on the top, stitch around the case 1/4 inch away from the edge of the zippered piece. Make sure that your tab and ring are laying flat so they won't interfere with your stitching.
12. Trim around the entire case about 1/8 inch away from stitching. Turn case right side out through the opened zipper, and iron. Top stitch all the way around the case. If you want this case to be a wee bit bigger, or you prefer the puffy look instead of the flat look, you can omit the top stitching. Enjoy!
Do you like free embroidery designs and tutorials?
Be sure to sign up for the weekly newsletter to get a free design every weekend (unless I'm running a sale). Sign up for Sher's Creative News
Friday, September 11, 2015
Are We Reaching the End of The Shopping Mall?
Back in the day when my mom took us shopping for school clothes seemed to be the beginning of the mall's popularity. At that time we only had two choices. By the time I was a teenager, they seemed to pop up all over the place. The day after Thanksgiving was a special treat because all the ladies in the family would meet at my mom's house and we'd head to Woodfield Mall Illinois. It was a blast! We also thought it was a treat because the malls had extended hours for Christmas. Back when I was much, much younger, they opened at eight instead of nine or ten, and no one camped out in the freezing cold at two in the morning to get that camera for $85 instead of $200. Crazy! And there is no way you'd catch me near any store the day after Thanksgiving anymore! That is now my decorating day so I don't have to face the crowds.
Now it seems like many are closing down while the big box stores and outlet stores are popping up all over the place. The area where I live is growing like crazy with stores and restaurants. Our poor mall only has two stores left, Carson's and Sears. Penney's just closed their doors there and I'm wondering how much longer the two remaining stores will be there. After all, they opened a Kohls, OfficeMax, Ross, Hobby Lobby, and many others just across the street and down the road.
It seems like the malls and cute little shopping towns are sliding slowly into history. In the photos above you will see my latest trip to the mall. It was actually eerie. It's the mall I mentioned that has only two stores left. All my special shopping days will remain in my memory and my heart forever!
Thursday, September 3, 2015
A New Spin on Fusible Applique
I actually owe credit for this idea to my husband. He took one of my Christmas towels to his work room without my knowledge and did some experimenting. He cut roughly around the applique and spray glued it to a piece of wood. He then took it to his scroll saw and cut it out as close as he could get to the outside stitching. When he showed it to me I couldn't believe what he did! It was so cute. Instead of getting mad at him for taking my Christmas hand towel and cutting it apart, I gave him a couple of my own appliques to cut out. He came back about 20 minutes later and I was in awe. My creative mind is now spinning!
They look so cute sitting up on a shelf. How cute would this be to drill a hole in the tops and make Christmas ornaments from your holiday appliques! Another cute idea is to make them up for all holidays and make pretty garlands. I've heard of people fusing them to card stock and making greeting cards from them, but this is another fun and creative way to use them.
Subscribe to:
Posts (Atom)