Thursday, June 9, 2016

My New Website's Grand Opening!


My new website is ready! I've been working typing my fingers to the bone for days and days! 

Stop by Sher's Creative Space and check it out! I'd love to hear what you think.


From now until June 12th you can get 20% OFF store-wide.

Just don't forget to use coupon code
GRANDOPENING
at checkout.

Tuesday, May 31, 2016

Travel Bags - More to My Addiction!


Anyone who knows me can tell you that I have a big problem with addiction. OK, not the mind altering addiction, but a purse addiction. I always have and I always will. I have other addictions as well, such as candles, chocolate, and sewing. But we'll get to those another time. Right now it's my purse addiction. I'm not asking for help or an intervention, just sharing a little part of it because it's become even more fun than it used to!

Now that I've delved into purse designing, I already have a couple purse patterns published, one being tested right now by my incredible pattern testers. I also have another in the beginning stages. Now that I'm making them, I've come to the conclusion that I need purses for various occasions. Lately I've been carrying the tiny bags such as The Paige Bag that holds my cellphone and a few necessities. I just hate lugging around a big bag. It seems like when I do, I don't use 99% of the stuff in there anyway. So time to pare down. 

Above you will see three fabrics that I have purchased online at fabric.com. They are all travel inspired. I couldn't decide between them so I bought them all. I want to make a fun little purse (a mini of course) for when I'm on the go. The hubster and I love to travel, especially for long weekends. I've finally decided how I'm going to use all those fabrics. The USA Road Trip fabric (center) will be used for the three week road trip the hubster and I will be taking as celebration for his retirement which will happen in the next six months to two years. He hasn't decided yet. It's going to be hard not to use that cute fabric before that time comes. I might have to buy more.

The map fabric (right) will be made for my next trip to visit my daughter in October. 

The stamps (left), I just love so I'm going to make an everyday bag carry this summer. I do have a lot more travel themed fabric (maybe another addiction) but these are already planned for something. So am I in over my head?

A little history. I designed my first purse when I was about fifteen years old. I remember it well and I wish I had a picture of it. Maybe someday I'll find one when I dig through the 25,000 pictures my mom has in boxes. I was so proud of that purse! I wish I still had it because it would fun to see how far my skills have come some fifty years later. I didn't have a budget, because I didn't have a job, so I used leftover fabric from mom and my projects from my Home Economics Sewing Class. Anyway, I'm in the process of remaking that pattern right now. It's quite a ways from being released but I'm really having so much fun with it but this time, I'm taking it to a whole new level!

Saturday, May 21, 2016

Viewing, Using, and Printing PDF Patterns


PDF patterns are becoming more and more popular everyday! Yes, everyday. There are numerous reasons for this such as:

Instant gratification When you see a pattern you like, you can purchase it and get started on making the project immediately.

Everyone can open them No matter what computer or mobile device you have, everyone can use the PDF which is actually a Portable Document Format file. It's pretty standard and the reader is free.

Price PDF patterns are often a little less expensive than printed patterns. There are no printing costs which can keep the cost down for the designer.

Easy to read You can easily read the pattern on your computer or mobile device and print only the pages that you need.

Huge selection You have pretty much an unlimited supply to make anything you need right at your fingertips, literally!

Supporting your independent designers Most PDF pattern makers are not sitting behind a desk delegating. No way! These designers are working in their studios for hours and hours on end to get the pattern from the image in their mind to the digital copy you receive. There is a lot more work put into designing digital patterns than most people realize. By supporting these small business owners, you are keeping their creative flow going, and contributing to a business that they are personally proud of. 

For those who are unsure to to read or print a PDF patterns, I'm going to guide you along the way. As a designer I do get questions on this subject, as well as seeing it brought up elsewhere.

First and foremost, every designer I know recommends you open, read, and print your files from the Adobe Acrobat Reader. If you don't have it, you can download it free from the ADOBE WEBSITE. If you are using your mobile device (cellphone, tablet, etc) you can download the Adobe Acrobat Reader app.

Why Adobe? Because it's the best! Also, it's completely stable, it's free, it's the most popular reader, it's user friendly, and a million other reasons. It's also a program that the designers are familiar with and are best able to help you if you run into a snag. There are so many readers out there, and I'm sure many of them are very good, and if it works for you, great, use it. If it doesn't, switch to Adobe where we can better assist you.

I personally like to read and print my patterns from my laptop, although I've used my mobile devices in the past as well. On my desktop version, you can see at the left, you get little images of the pages. This is so helpful when you are trying to find something.


What I like best is that if you want to remember something that you will need to refer back to, you can easily "highlight" that area so it will stand out from the rest of the pattern. It's so simple too. Just click on that little highlighter icon at the top of the screen, then drag your cursor over the are you want to highlight. Simple! You can also do this on your mobile devices by clicking on your menu at the bottom and it will bring up your little highlighter.


Many of you are probably already familiar with the bookmarking. Just click the little bookmark item at the top, and you can bring that page up anytime you want! You'll find it at the top on the mobile devices and the upper left on the desktop version.


Another thing you will find super handy is the "notes" feature. You will see a little icon that resembles one of those speaking clouds you see on cartoons. Inside that will be little lines. You click on that then it will ask you to tap on an area you want to leave a note. It brings up a little sticky note type thing and you make your notation there. This is especially handy if you want to change the size of something, or you don't want to forget where you purchased your supplies. After you write your note and close it, you will always see that little icon there so you can click on it and see what the note is telling you. Just be sure to save your changes to the document if you want to use that pattern again. If you don't want to save the changes, don't, and your pattern will be exactly the way you started. This is also available on the mobile devices too. How many of us have written all over our paper patterns? I do all the time. This way, you are doing the same thing but on your digital pattern. Love this feature more than I thought I would.


There are so many other things you can do with this reader, but that's an entire lesson so those were the basics for reading and making your patterns work best for you. I personally plan to play with the program more so I can find other things to do with it.

OK, you now know the basics. One of the most important things to know is how to print your pattern. If you want your pattern to turn out perfect, it must be printed out at 100% actual size. This will be found in your printer settings.

When your print box appears, you will have that option. Not all readers make it this easy for you and that's another reason why we all like Adobe. You will notice you have the option to print at Actual Size. You will also see a Custom Scale where my box says 100%. If you want a bigger item, you can choose a bigger percent, if you want a smaller item, you can choose a smaller percent. This is best handy when you are printing out things such as appliques. Many of the applique templates I sell are changed by the customer this way. If they want to add an applique to a baby bib or candle cozy, they certainly don't need the 7 inch size I have provided. For most patterns, you will print it out at 100%.


Some patterns you might want to enlarge or reduce most of the pieces while others will be printed out at 100% such as wrist straps, connector tabs, zipper ends, etc. Those need to remain the size they were designed at while the other pattern pieces can be adjusted by changing the percent of your printout.

The next most important thing you need to know about printing a pattern is which pages you want to print. I don't like to print the instructions because it's a waste of paper and ink. I print out the pattern pages I need and the list of dimensions if there are any. So I just put those pages into the box for printing. On my mobile app, I check or un-check the pages. Obviously, the pages I'm printing will be left checked.


Also remember that you will need to make sure your page orientation matches, and in most cases this is set to automatic so they do. This means if your pattern is being read in portrait style, make sure it prints this way.


On many patterns you will have to piece together a couple or more pieces. This is because your printer only prints out so big and your pattern piece will not fit on one page. The pattern designer will show you what to tape to, and where to tape it. On my patterns I have a little image that looks like scotch tape that tell you exactly where to tape your pieces. Super simple!


Basically that's it! If you are unfamiliar with reading, using, and printing your patterns, I hope this article was a big help to you.

The pattern I've been using for a reference is the So Many Ways Cellphone Case which is available at Etsy and Craftsy.

Here is one more final tip; if you go into the advanced computer settings you can choose to print in DRAFT mode. This is where your computer will print while using the least amount of ink possible to do the job. I used to do this but now I use the HP Instant Ink Program where I'm charged by the amount of pages I print instead of the amount of ink I use. I suppose that is a tip in itself and well worth it if you have an HP printer. I save a fortune on ink! Just printing out my photos used to cost a fortune, but no more!

Wednesday, March 23, 2016

New Applique Shop Now Open

Since my applique templates are so popular, I decided to open a shop for just them. This new shop is at the Meylah Marketplace. If you stop by, you can use the coupon code NOWOPEN to get 20% off through this weekend only. I have a huge selection and I'm adding more!

Follow this link to my new shop:

Sher's PDF Applique Templates

Monday, March 21, 2016

Thank You to My Pattern Testers Once Again!


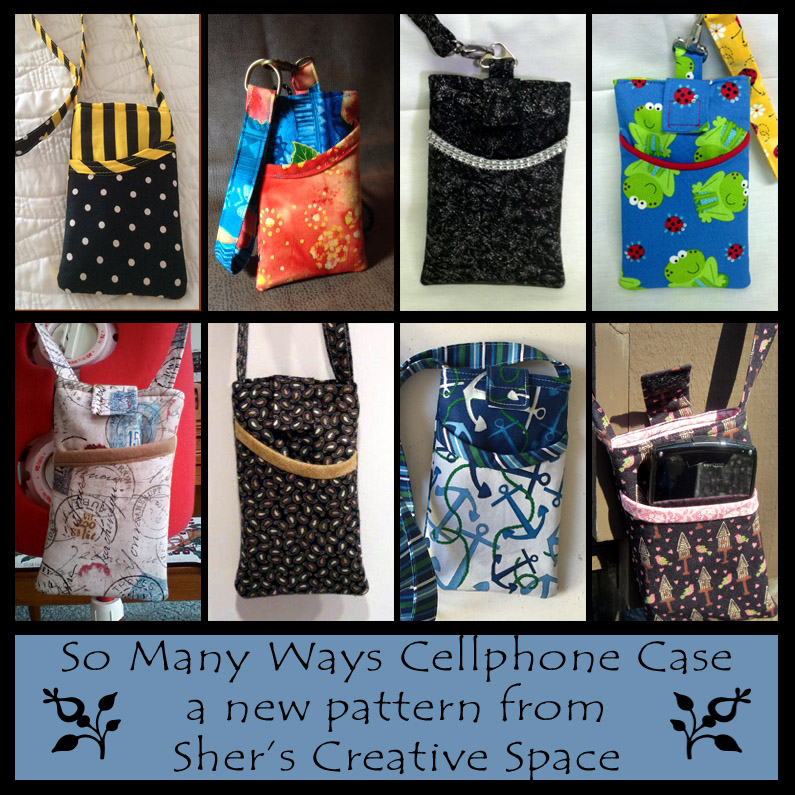
A great big THANK YOU goes out to my pattern testers. This time around they tested my So Many Ways Cellphone Case. It's a fun little case when you just need to grab your phone, your ID, card or cash, and even your earbuds. Great for taking the dog for a walk, or running errands. This case has several options you can apply, so you can make it to fit your needs.

Trish (https://www.instagram.com/trishhfly) used these super bright and cheerful blues and oranges. Great contrast in colors and I am loving this!


Maxine took my pattern to a whole other level with hers. She first sent me her case with this cute ladybug fabric with lots of color, which was adorable. I later got another photo from her of the dressy one. Wow! What a brilliant idea! In place of the binding she used this sparkly trim on this elegant fabric. After seeing hers I had to run out to the fabric store to buy fancy trims so I can make one for me! She also added her own creative touch by replacing the binding on the ladybug case with piping.


Julia (www.youravon.com/jbojarcik) is another one that made me go shopping after receiving her pictures. She used the fabric from my absolute favorite fabric designer, Tim Holtz. I've been admiring that fabric for some time now so I figured it was time to order some. It has already arrived and I love it!


Jodi used this super cute nautical fabric. Instead of two different colors, she used three and they all come together seamlessly. I love the way she used the third fabric for the pocket binding and strap. Love the anchors with the mix of blues too. 


Jeanne combined this earthy little bird and birdhouse fabric with a touch of pink with great results! She took her pictures outside with a pretty lake in the background. Between that and the cute fabric, it made me think of Spring!


Chris chose this tiny cute paisley print fabric. I've never seen a paisley done in such a small print and I love it! It's the perfect fabric for such a small project. Pairing it with the tan binding is a perfect touch!


Celia (www.facebook.com/SerendipityHandbags) did one of my favorite things with this pattern. She mixed stripes and dots. The yellow and black go so perfect together! Instead of making the strap a one size fits all, she decided to make it a "tie" so that the recipient can use it as a crossbody or a neck strap. Great idea!


My personal favorite of the three options is the belt clip. The clip does have to be special ordered but is extremely inexpensive. I believe I paid about a buck a piece for them. I give the link to two shops that sell them on the pattern.


Thanks again to all my wonderful pattern testers! You're help is much appreciated.

Thursday, March 17, 2016

Fussy Cuts - Tips, Tricks, and Techniques


Have you ever tried to fussy cut? If you haven't it's a great way to make an item look exactly the way you want it. It allows you to put the focus where you want it. My article is ready at So Sew Easy and you can find it right HERE.

Saturday, February 20, 2016

Sewing For Me and Sharing The Love


I don't make New Year's resolutions because I would never keep them. However, I did decide that 2016 is going to be a year that I am going to sew for myself and my family by making fun things. Designing patterns is and has always been my passion and I'm so lucky to be able to make my living doing so. Back in 1993 when I had my first design published in a magazine this was my dream, and now with the Internet, it is happening.

Since starting my business, I forgot what it was like to sew strictly for enjoyment. No taking photos of progress, no jotting down notes, no making prototypes, and no need for pattern testers. It's all about relaxing and fun sewing. It is so rewarding!

When I say "Sharing the Love" I mean that in two ways. First, all the little gifts and things I'm making for family, and second, showing off my creations from other designer's patterns. Yes, I purchase patterns from other designers, and follow their blog tutorials too!

Most recently I created the items you see in the photo. The Bionic Gear Bag is probably one of the most creative and unique things I've ever seen! As soon as I saw it I knew I needed a couple of them. I made one to keep my everyday sewing supplies in, and another to store my electronic gear such as my point and shoot camera, spare batteries, chargers, flash drives, etc. There's even room in there to stash some of my favorite teas, and other things I'll need when traveling. After I made mine, I made one small adjustment to the pattern (changed up the front tray) and made one for both of my moms. I have a couple more in the works. I hope my family isn't reading this post.

I also whipped up these simple potholders that I found on Stitching With 2 Strings blog. My poor old things were actually wearing so badly that I was burning my hands. These could not have been any easier or quicker. It took more time to choose the fabrics than it did assemble them! I'll be making more, and I'll be making some smaller ones to use as coasters. My folded paper towel on my stone coaster isn't very pretty.

I made up a whole bunch of these little earbud cases or coin purses and gave them to the ladies in my family on a recent trip to the Smokey Mountains.

I don't even know where to begin with all the little snack bags, zipper bags, and other little bags I've been making. As for wristlets, I just listed one and yet I'm still making more. My daughter claimed one of them so I made another one exactly the same, then I thought, I really need more of these!

I spent one day making some cute and personalized labels for my personal and business projects. They came out so cute that I shared them with the So Sew Easy website. You can find the tutorial to make your own right HERE.

BTW....I often find the need for pattern testers. If you would like to be one of my testers, just click the link at the top of the page that says Pattern Testers, or click HERE. I'll be needing them again soon!

Friday, February 12, 2016

YES! You CAN Make Your Own Sewing Labels!


I am so excited about my most recent article and tutorial at So Sew Easy! I spent an entire day making lots of labels to test out the different techniques and I share them all with you in this article. These are so fun and easy to make, you'll wonder why you never made the before. If you have a business or you enjoy making gifts for friends and family, you can make awesome and personalized labels. You work hard on your projects, take it to the next level and give it the label it deserves! I will show you how right HERE!

Tuesday, February 2, 2016

Paige Bag Pattern - Thank You to My Pattern Testers!


When I put a call out for pattern testers, I got an overwhelming response. Not only were there a lot of them, it seems as though I got the best of the best! They were asked to make this purse, or wristlet, or both. They gave me great advice and found all my typos and boo boos. The pattern they were testing is for my Paige Crossbody Hipster Bag and matching Paige Wristlet or Cellphone Case. They certainly didn't disappoint!


Maxine used two different nurse themed fabrics to create her purse and wristlet. Love this theme, in fact, I can think of several people who would love these bags!


Sally chose this cute purse themed fabric. She also added a cute little purse charm on the front zipper. Be sure to stop by her blog and shop http://www.sallysaidsew.com.


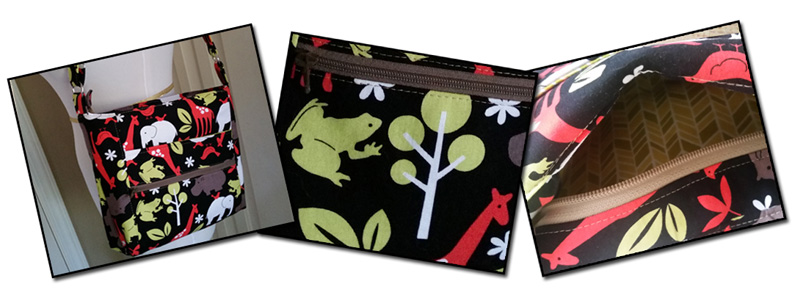
Jen's purse is made up of this bright and colorful animal print. I'm loving the colors she chose for her zippers. She is going to be in full purse fashion when she's on various outings with the family!


Rose chose this soft print fabric in greens and golds. Love the way the purse matches the wristlet. It makes me think of spring!


Janet used this bright and cheerful deep pink, green, gold, and white fabric. Another fun color combination!


Lorraine went with this very sophisticated print. I just love the contrast of the lining fabric with the exterior of the bag.


Alex created her bag from this awesome big leaf fabric. The contrast of the browns and tans against the white background is stunning!


Trish went completely fun and colorful with the fishies on the purse (I say fishies because it's my two year old granddaughter's favorite thing), and the LOVE themed wristlet. Be sure to follow her on instagram https://www.instagram.com/trishhfly/ where you can see all her great projects.


Celia's purse is full of pretty wildflowers. I love the pink and blue accents, and those sunglasses too! I notice she uses decorative stitches for her top stitching. I really need to try that on some of my bags. So creative and clever! You can visit her facebook page at https://www.facebook.com/SerendipityHandbags and see all the fun bags she makes.


Donna completed both bags from this super hero fabric. Who doesn't love and appreciate Wonder Woman? I love the use of the black hardware. It's a perfect match for these bags!


Shanna used this pretty floral print on both of her bags. Great colors and the lining is perfect! Definitely makes me think of spring! Stop by her facebook page and look at all the bags she's been busy making https://www.facebook.com/ifISAYsew

Thanks again to all my talented testers. Your time is so much appreciated. If any of my readers would be interested in becoming a pattern tester for future patterns, stop by my website for information.

If you'd like to make these bags for yourself, you can find them at my Craftsy Shop and my Etsy Shop.

For the first 48 hours, they can be purchased for a special introductory price. On Thursday night (Feb 4th, 2016, Chicago timezone) they will go up to their everyday price.

Wednesday, December 30, 2015

Sewing Essentials - My Favorite Studio Supplies


As many of you already know, a few months ago I joined forces with So Sew Easy, and it's been a fun and educational experience. Before that I would stop by the site now and then, but now that I've become a part of it (actually a contributor), I've had many opportunities to really look it over. There so many free tutorials, tips, and a crazy amount of sewing information! 

Today I'm sharing a list of my favorite sewing essentials. Some of them you may already have, and some, you may not know yet that you really need. Stop by So Sew Easy and take a look. I gotta warn you, you might just be sitting at the computer all day looking through all the fun stuff!
Related Posts Plugin for WordPress, Blogger...