Showing posts with label Tips. Show all posts

Thursday, July 3, 2025

Finding the Grainline and Why it Matters

I don't sew clothing, but I do make a lot of bags. I make bags for every purpose imaginable. If you sew clothes, curtains or bags, you need to know how important the grainline is. If you are using a woven fabric such as 100% cotton or a woven cotton blend, you need to pay attention to how you are laying your pattern pieces.

Woven fabrics are made up of lengthwise threads, and crosswise threads. It is important to know the difference when you are making something that needs to hang properly or where strength is needed. The best way to find the grainline is by looking at the selvage. The grainline always runs parallel to the selvage. But sometimes you may have a piece of fabric where the selvage has been cut away, or maybe the fabric is an odd shape. Finding the grainline is very simple and I’m going to show you how. You can use the images above for reference.

The crosswise grain has a slight amount of stretch. It’s strong (as far as holding its shape), but not nearly as strong as the grainline, or sometimes called the lengthwise grain.

The lengthwise grain has no stretch at all. This would be the grainline. Can you see why this would be stronger and holding its shape when you are making a purse where it will be holding weighted items? If you are making a purse for example, you'll want the lengthwise grain to be vertical. This way there would be no "give" in the fabric and it will hold its shape. If you are making a matching strap, you definitely want to cut the fabric along the grainline for the length of the strap.

The bias has a lot of stretch. This would be at a 45° angle from your grain lines. When you pull the fabric along the diagonal, you get a lot of stretch. That is why you would cut a bias tape in this direction. The stretch allows you to go around curves easily. 


Sign up for Sher's Creative News so you don't miss anything!

There's a free machine embroidery design in every issue (unless I'm running a sale). You'll also find links to free sewing tutorials and articles too. The newsletter goes out once a week.  

Thursday, May 29, 2025

Dream Journals

Let's talk about one of my favorite subjects...dreams! I am so fascinated with this subject. I always have crazy dreams and some of them seem so real. A few years back I decided to start a dream journal and I'm so happy I did. I love to look back at some of them and read them. It's always good for a laugh. The photo above is from a dream a few years ago. My friend and I were riding our bikes to downtown Gary to visit the lakefront. And yes, we were carrying ironing boards. Just why?! And if you're not familiar with Gary, you don't want to ride a bike, car, or anything there. And the funny thing is that we could have easily grabbed our ironing boards and visited the lakefront that's 10-mile (maybe less) drive from my house. Same lakefront but safer area and it has a beautiful lighthouse.

I find that recurring dreams are most interesting because I'm sure there's an underlying message, they are trying to send you. For example, for years and years I kept having this dream that I was trying to find the underground shopping in Toronto. I've been there in my much younger years and I guess it left an impression on me. In my dream I can almost find it but something just doesn't seem right. Well, fast forward to 2023 and my husband and I went to Toronto, and I was able to show him the underground shopping. It's called The Path and he really loved it! But after my recent visit, I haven't dreamed about it again. Strange!

I could go on and on with a long list of my dreams from my journal but I'm thinking you have your own funny dreams to think about. I log mine in my notes app but they have some really cool apps for Android and iPhone that will help you create a journal that can be a lot of fun. Some of the apps come with AI features that will help you animate or illustrate them. For my dream images I used the AI functions of ChatGPT and Copilot. It's one of those things that you can get lost in and before you know it, you're late for dinner!

I do have a few suggestions though if you want to keep a dream journal.

The key to remembering them is to jot them down right away. You can even use the microphone on your phone to talk into. If you don't do this, there is a good chance you will forget it. I don't know why. In fact, when I look back at my journals, I don't remember most of them. I am so glad I wrote them down.


Sign up for Sher's Creative News so you don't miss anything!

There's a free machine embroidery design in every issue (unless I'm running a sale). You'll also find links to free sewing tutorials and articles too. The newsletter goes out once a week.  

Thursday, May 15, 2025

Cookie Sheets, Spatula, Oven Mitt - For the Sewing Room?


Some of my favorite sewing supplies are actually kitchen items, and I use them all the time. There are other odd things I've found around the house that I find helpful as well. Right now I'll discuss my three favorites.

Baking sheets: I bought the set that comes with three different sizes. These things are the most helpful for everything. I use them to separate fabric pieces for projects, to set on my lap while I'm watching a movie and doing some hand stitching or clipping jump threads from my embroidery projects. They are also great for organizing the various steps in smaller items like the gift card holders above. If you want to make those, there is a free tutorial right HERE on the blog. It's a great kids project. I made some that I hand stitched instead of gluing and painting.

Rubber spatula: I think of this one as my hand and finger saver. When I'm at the embroidery machine and I'm needing to hold something in place or move something out of the way, I use this instead of my fingers. As of this writing, I've never had a needle go through my fingers!

Super thick oven mitt: This item is invaluable for ironing in areas that can't be laid flat when pressing. I don't use this as much as the other items, but when I do need it, I'm happy to have it. 

And no, I don't use any of these items in the kitchen also. They are now my sewing supplies.


Sign up for Sher's Creative News so you don't miss anything!

There's a free machine embroidery design in every issue (unless I'm running a sale). You'll also find links to free sewing tutorials and articles too. The newsletter goes out once a week.  

Wednesday, April 9, 2025

Favorites - I Love These Machine Embroidery Supplies

Time for some more favorites! These are the four items that I use in my studio on a regular basis. 

Pre-wound bobbins are a massive time saver. I order a large box of white, and I also have them in several colors. The last thing I want to do when I need a bobbin is to stop and create some more. This way they are always on hand, and I don't have to stop what I'm doing.

Basting adhesive really makes stabilizing easy. I much prefer it over pins and tape. Sometimes, depending on what I'm stabilizing, I'll use it with pins. It makes such a difference when making things that require a layer of batting such as coasters, zipper bags, etc. I used to worry about it gumming up my needle, but after several years of use, it hasn't happened yet.

These snips make clipping threads neater. I don't use these for cutting away fabrics, but they are great when you need to clip that thread close to the stitching. They are so thin and lightweight. As for clipping away excess fabric for applique, I like to use my curved embroidery scissors.

Snag Nab-It Tool is probably the best thing ever invented for embroidery, sewing, and basic snag repair. It has a sharp point on one end, and a rough section on the other end. It's made to pull snags through to the back which turns a damaged sweater into like new. Have you ever finished a project, and everything looks beautiful except those one or two stiches in your silky satin stitches that the needle obviously missed? Of course you have! And it's not your fault. This tool is designed to make it look like it never happened. You just find the stitch that didn't stitch (or just sticking out in a weird way) and insert the pointed end right at that stitch on the top of the project. Then you gently push it completely through. The rough edges on the opposite end of the tool will catch that annoying thread and bring it right through to the backside. If you want you can put a tiny drop of Fray Check on the back where the stitch is but honestly, I've never worried about that. And you know these thread mishaps always happen at the end of your project after you've done all that work! TIP: Store it in the little plastic sleeve it came in and maybe put a dot of paint or nail polish on the plastic sleeve. This little thing is so easy to lose.


Sign up for Sher's Creative News so you don't miss anything!

There's a free machine embroidery design in every issue (unless I'm running a sale). You'll also find links to free sewing tutorials and articles too. The newsletter goes out once a week. 


Wednesday, March 19, 2025

Some of My Favorite Sewing Supplies

This week I'm sharing some of my absolute favorite sewing supplies. I have been sewing for over 50 years. That's right, I started as a young child. When we were younger my sister and I made all our Barbie clothes and Barbie furniture. That was also the time when I made my first purse. I wish everyday photography were a thing then because I could share the pictures. I was quite proud of that one. I'm not sure which of my addictions began, the sewing or the purses. A girl cannot have too many purses! But that's a whole other blog post.

Let's get started on my favorite supplies. From left to right...

1. Anything from the Sewline brand. Their marking pencils are the best! I have the pencil with the three different colors (white, pink, dark gray). It's a mechanical type of pencil that works beautifully. You turn the bottom half of the pencil to the desired marking color. You can also adjust to let out more lead when you need it. I use it so much and I'm waiting on my refills to arrive any day now. I also love their eraser that is made to go with these pencils. Just like the marking pencil, you can extend it for more eraser. Since it's designed like a pencil, it's so easy to use. And there are also refills available for these too. Probably my favorite of all my tools.

2. Next is HeatnBond Lite. All the products with this name are the best in my opinion. The strong or ultra hold sticks very well and is easy to use. Most of the time I use the Lite. It's designed to hold things down so you can stitch on it. It never gums up your needle and holds very well. This is the only one I will use when making my fabric appliques for machine embroidery and hand embroidery.

3. Jean-a-ma-jig. There are other brands and styles of this that do the job, but this is the one that I have had for many, many years and it has served me well. Since I love to make tote bags, small wallets, and purses there are times when I'm trying to stitch over a bulky seam, and this is a huge help. It prevents my sewing machine foot from getting stuck at the beginning of that area, so the seam is nice and even. I just used it yesterday when making up a bunch of credit card wallets for a donation for the local women's shelter. I zipped right on through with ease!

4. These little fabric clips. I have the Clover brand. I got them when they first came out and I believe that Clover was the only brand at that time. Now you can easily find them, and you can find them at a better price. Sometimes I feel a pin is needed but for the most part, I use these.

So, there you have it. These are my top four sewing tools. I have many tools and I'll be sharing more of them with you at another time. All the tools listed above are very easy to find.


Sign up for Sher's Creative News so you don't miss anything!

There's a free machine embroidery design in every issue (unless I'm running a sale). You'll also find links to free sewing tutorials and articles too. The newsletter goes out once a week. 


Friday, July 19, 2024

Safety First - Always!


This post is a bit different than my usual crafting and sewing articles. I have what I feel is an important message because of our own personal experience this week. 

If you don't have a carbon monoxide detector, you need to buy one. If you can't remember when you last purchased one, buy a new one. We had a horrible storm this week that not only did a lot of damage, but left many of us without power for three days. 

Several years back we purchased a whole house generator. Second night in, we were awakened by our carbon monoxide detector. We immediately went outside and called 911. The fire department came with their meter and yes, the levels were high. They called our power company and came out and made several checks. It appeared that our generator gasses were seeping into the house via the dryer vent. We covered it up with duck tape, aired the house, then turned the generator back on. Next night, it happened again! This time we just turned off the generator and went to bed. Of course we aired out the house first. 

The important message here is that if we didn't have that carbon monoxide detector, we would have been in a closed up house for three days! More than likely I wouldn't be here to write this post had we stayed with toxic gasses for three days.

So order one if you don't have one. The one we have plugs right into an outlet so no attaching to a wall is needed. We have another one coming tomorrow. Since this one has done it's job, we are replacing it. They are also inexpensive. The one I just bought I ordered from Amazon for around $20.

Feel free to share this post, or share the experience with someone you know. They really do save lives!!!

Photo for attention. We took a road trip this past month and this is some of the beauty we enjoyed along the way.

Thursday, June 13, 2024

Tutorial - Super Quick and Easy Cord Tamers


If you have an embroidery machine and make key fobs, I'm pretty sure you have a whole bunch of vinyl scraps and kamsnaps laying around. Here is a project that couldn't be any easier.

Cut your scraps into strips of various widths and lengths

Apply a set of kamsnaps to each one

Wrap around your cables and cords to keep them  neat and tidy.

That's it!


Sign up for Sher's Creative News

There's a free machine embroidery design in every issue (unless I'm running a sale). You'll also find links to free sewing tutorials and articles too. The newsletter goes out once a week. 

Tuesday, April 30, 2024

Dry Shampoo Hack - Great Tip and so Frugal!


I don't remember where I saw this or how long ago it was but this simple and super cheap hack has saved my hair more than once.

For the past couple of years, I have discovered that my hair looks healthier (and the color last longer too) if I only wash it 2 or 3 times a week. Every time you wash your hair, you are also washing away important natural oils that your hair needs.

If you need to run out of the house and your hair is getting to the end of your hair washing break, or it's a little oilier than normal, this hack will have your hair looking fresh and beautiful. I find that this is best when done before bed if you plan to run out in the morning for a quick meeting or errand.

The simple ingredients.....cornstarch and baking cocoa. This does make sense because cornstarch absorbs moisture. And the cocoa powder is simply to take away the white powder look. I'm blonde so I just use a small amount. For dark hair, you can use more. 

***Just be sure not to let your cat or dog lick your hair because unsweetened chocolate is highly toxic to them.

I keep mine in the bathroom in a 1 cup size container and apply it with a large makeup brush. It's really that simple! That cup will probably last me a lifetime since I don't use it all that often. You can also put it in a shaker container and shake it on, then brush it out.

You only need to put it close to the scalp then give a good brushing or combing.


Don't miss any sewing tutorials, helpful tips, or free embroidery designs! 

Sign up for Sher's Creative News

There's a free machine embroidery design in every issue (unless I'm running a sale). You'll also find links to free sewing tutorials and articles too. The newsletter goes out once a week. 

Wednesday, July 26, 2023

Turn a Blog Tutorial into a PDF Document You Can Save


Did you know that it's so easy to turn blog tutorials into PDF documents you can save to your computer to view offline? And it only involves a couple quick steps. Gotta love technology!


If you are looking for a particular post such as a recipe, list, or tutorial, you can either click on the tab to that section or do a search on the blog. If you are already on the page you want, perfect!


Make sure that the post you want to convert is the only post selected otherwise you will be saving a lot of posts at once. For example, on my blog, you just click on the title and you'll get just that blog post.


Now that you have chosen your post, just do a Control + P and it will bring up your print window. Normally your printer will be selected in the Destination box, click the little down triangle and choose Save as PDF. If you want to save the entire post, just click Save. Some posts have a lot of comments and other things following the post so you can choose only the pages you want. You'll find that right below the Destination. It will say Pages

Once you've chosen the pages you want, choose Save and then you'll need to save it to a folder on your computer, or you can just save it to your desktop. Make sure you give it a name that you will find when looking for it and that's it! Now your recipe, notes list, tutorial, ideas list, etc... will be at your fingertips when you need it!

TIP: Create a folder on your tablet or computer for ideas and such. Create sub-folders and you can catalog all your ideas in one place for easy access. You can create the sub-folders for such subjects like recipes, petcare, baby tips, etc.

This is especially handy for saving the craft or sewing tutorials because you can load them onto your tablet for easy viewing when you're ready to create the project!


Do you like free embroidery designs and tutorials?

Be sure to sign up for the weekly newsletter to get a free design every weekend (unless I'm running a sale). Sign up for Sher's Creative News

Tuesday, April 25, 2023

Some of My Favorite Apps


Since I've been blogging (lots of years), every now and then I make a post about my favorite apps. Of course these tend to change as more apps become available and more apps are updated. As of this writing, the following are my favorite apps:

1. Google Calendar - I suppose this will always remain on my list of favorites because it keeps my time so organized. I love the fact that along with the "events," it allows you to create tasks. I use the task feature as my daily to do list. The way I like to look at it is to go into the schedule and you have a nice list. I love that you can even add details to your tasks. You can even make recurring appointments for your events such as birthdays, bill payments, etc...

2. Readly - For around $12 a month, I can read unlimited magazines and even back issues. Every magazine I like, they have it. Each family member can have their own sign-in as well. I sure do get my moneys worth out of that one. And they have all the popular magazines and more!

3. Samsung Notes - This is my second brain! I used to pay for another note-taking app but since I discovered Samsung Notes, I like it even better. This app can only be used on Samsung devices and computers with Windows operating system. It syncs seamlessly among my devices. I love that I can annotate and create PDF documents on it. Between this and my calendar app, my life is so orgainzed! I might be obsessed over this one. And it's free!

4. Canva - I just discovered this one. I love it for creating ads. It's so quick to make them and I can do them from my computer or my tablet. I still use my drawing program but this is so handy.

5. Sketchbook - This is a nice drawing app. I no longer sell my artwork or clipart but I love to relax by doing some drawings.

That's my list for today. If you'd like to check any of these out, you can get them from the place where you get your apps.

Photo above: A picture of my sweet cat, Punkie. She lived to be almost nineteen and I still miss her every day.


Saturday, November 12, 2016

Purge, Donate, Up-cycle, Recycle


Before you throw out or toss to the side, see if you can bring that old item back to life!

I pull off any embellishments such as zippers, buttons, and purse hardware before tossing the item, especially from purses. If you sew, you know how valuable zippers and hardware can be. For the zippers, I keep a basket in my sewing room to store them until I can get a chance to separate them from the fabric. This is a great project to do while watching a movie with the hubster. 

My daughter is a master of up-cycling. When I was out visiting her this summer I was admiring her pegboard that she made for her office/studio. I couldn't believe it when she told me the cute little holders used to be Crystal Light containers! After spraying them with a plastic paint, she put a sealer on them and added some embellishments. How cute!

In the photo above you will also see how she took old book pages, tea dyed them, and decoupaged them to the table and lampshade. She even made the lamp base out of old books!

My next project will be this really cute Collapsible Thread Catcher from The Fabric Therapy Blog. Can you believe it's made from parts of a Pringles container?


Next time you think about de-cluttering, think about the many different things you could do with the items you no longer want.


Friday, July 29, 2016

Christmas in July - Tablescapes


We have come to the end of our Christmas in July Celebration. The month sure did go fast! I’m going to close this subject with a discussion, and by sharing some ideas for tablescapes.

I don’t do a whole lot of entertaining for the holidays but I do have a few dinners or a craft party here and there. Years ago I did themed teas. I had themes such as A Reindeer Tea, A Sweet Shoppe Tea, and A Shopping in the Big City Tea. Those are just a few. Everything matched the theme from the invitations right down to the favors and decorations. They were a blast! We also had delicious food.

One thing that is important to me when having such an event or dinner, is the festive details. I like everything to be perfect, and I want my table to look and feel spectacular! It’s so easy to do this too. Many times you can do this with things you already have around the house. Just let your creative mind take you away! If you need some inspiration, check out the many ideas you can find on Pinterest.

If you are the crafty type, which many of my readers are, you can whip up some cute decorations for your own table. This week’s CRAZY DEAL can even help you with that task. So get inspired to make your dinner or even a fun time that everyone will remember fondly.

Below are a few of the favorites that I found while searching for some cute and festive examples.


Image Source: HERE


Image Source: HERE


Image Source: HERE

Friday, July 22, 2016

How to Host an Awesome Craft Party!


Have you ever thought about hosting a craft or sewing party? I’ve hosted a couple, and I’ve been to a couple. They sure are a lot of fun! Most recently I had a glass painting party. We even had my then three year old niece in attendance and she had a blast too. 


Here is how I coordinated mine. We each bought a few bottles of enamel paint. We did make sure we weren’t purchasing doubles. Some bought a couple brushes and some already had some. I had more than enough to share. I made sure I had (which I always do) plenty of disposable plastic cups, paper plates, and napkins. Everyone also brought the glass items they wanted to paint. We actually went to the dollar store and bought martini glasses, wine glasses, candle cups, etc. I even had a stash of baby food jars I stashed away when the granddaughter was here. I also stocked up on wine and snacks for my guests. 


I placed large sheets of rosin paper (nice to have on hand for so many projects) over my dining room table and my kitchen counter top to keep them safe from paint. We had such a good time and we all made some great gifts. They did the baking at home because this particular craft requires you bake the glass in a slow oven for about thirty minutes, but not until the glass has set for forty-eight hours.


We had so much fun at this one, we all had another one at my sister’s house a few weeks later. Why not give it a try? Maybe like us, you’ll be starting a new family tradition!

Saturday, May 21, 2016

Viewing, Using, and Printing PDF Patterns


PDF patterns are becoming more and more popular everyday! Yes, everyday. There are numerous reasons for this such as:

Instant gratification When you see a pattern you like, you can purchase it and get started on making the project immediately.

Everyone can open them No matter what computer or mobile device you have, everyone can use the PDF which is actually a Portable Document Format file. It's pretty standard and the reader is free.

Price PDF patterns are often a little less expensive than printed patterns. There are no printing costs which can keep the cost down for the designer.

Easy to read You can easily read the pattern on your computer or mobile device and print only the pages that you need.

Huge selection You have pretty much an unlimited supply to make anything you need right at your fingertips, literally!

Supporting your independent designers Most PDF pattern makers are not sitting behind a desk delegating. No way! These designers are working in their studios for hours and hours on end to get the pattern from the image in their mind to the digital copy you receive. There is a lot more work put into designing digital patterns than most people realize. By supporting these small business owners, you are keeping their creative flow going, and contributing to a business that they are personally proud of. 

For those who are unsure to to read or print a PDF patterns, I'm going to guide you along the way. As a designer I do get questions on this subject, as well as seeing it brought up elsewhere.

First and foremost, every designer I know recommends you open, read, and print your files from the Adobe Acrobat Reader. If you don't have it, you can download it free from the ADOBE WEBSITE. If you are using your mobile device (cellphone, tablet, etc) you can download the Adobe Acrobat Reader app.

Why Adobe? Because it's the best! Also, it's completely stable, it's free, it's the most popular reader, it's user friendly, and a million other reasons. It's also a program that the designers are familiar with and are best able to help you if you run into a snag. There are so many readers out there, and I'm sure many of them are very good, and if it works for you, great, use it. If it doesn't, switch to Adobe where we can better assist you.

I personally like to read and print my patterns from my laptop, although I've used my mobile devices in the past as well. On my desktop version, you can see at the left, you get little images of the pages. This is so helpful when you are trying to find something.


What I like best is that if you want to remember something that you will need to refer back to, you can easily "highlight" that area so it will stand out from the rest of the pattern. It's so simple too. Just click on that little highlighter icon at the top of the screen, then drag your cursor over the are you want to highlight. Simple! You can also do this on your mobile devices by clicking on your menu at the bottom and it will bring up your little highlighter.


Many of you are probably already familiar with the bookmarking. Just click the little bookmark item at the top, and you can bring that page up anytime you want! You'll find it at the top on the mobile devices and the upper left on the desktop version.


Another thing you will find super handy is the "notes" feature. You will see a little icon that resembles one of those speaking clouds you see on cartoons. Inside that will be little lines. You click on that then it will ask you to tap on an area you want to leave a note. It brings up a little sticky note type thing and you make your notation there. This is especially handy if you want to change the size of something, or you don't want to forget where you purchased your supplies. After you write your note and close it, you will always see that little icon there so you can click on it and see what the note is telling you. Just be sure to save your changes to the document if you want to use that pattern again. If you don't want to save the changes, don't, and your pattern will be exactly the way you started. This is also available on the mobile devices too. How many of us have written all over our paper patterns? I do all the time. This way, you are doing the same thing but on your digital pattern. Love this feature more than I thought I would.


There are so many other things you can do with this reader, but that's an entire lesson so those were the basics for reading and making your patterns work best for you. I personally plan to play with the program more so I can find other things to do with it.

OK, you now know the basics. One of the most important things to know is how to print your pattern. If you want your pattern to turn out perfect, it must be printed out at 100% actual size. This will be found in your printer settings.

When your print box appears, you will have that option. Not all readers make it this easy for you and that's another reason why we all like Adobe. You will notice you have the option to print at Actual Size. You will also see a Custom Scale where my box says 100%. If you want a bigger item, you can choose a bigger percent, if you want a smaller item, you can choose a smaller percent. This is best handy when you are printing out things such as appliques. Many of the applique templates I sell are changed by the customer this way. If they want to add an applique to a baby bib or candle cozy, they certainly don't need the 7 inch size I have provided. For most patterns, you will print it out at 100%.


Some patterns you might want to enlarge or reduce most of the pieces while others will be printed out at 100% such as wrist straps, connector tabs, zipper ends, etc. Those need to remain the size they were designed at while the other pattern pieces can be adjusted by changing the percent of your printout.

The next most important thing you need to know about printing a pattern is which pages you want to print. I don't like to print the instructions because it's a waste of paper and ink. I print out the pattern pages I need and the list of dimensions if there are any. So I just put those pages into the box for printing. On my mobile app, I check or un-check the pages. Obviously, the pages I'm printing will be left checked.


Also remember that you will need to make sure your page orientation matches, and in most cases this is set to automatic so they do. This means if your pattern is being read in portrait style, make sure it prints this way.


On many patterns you will have to piece together a couple or more pieces. This is because your printer only prints out so big and your pattern piece will not fit on one page. The pattern designer will show you what to tape to, and where to tape it. On my patterns I have a little image that looks like scotch tape that tell you exactly where to tape your pieces. Super simple!


Basically that's it! If you are unfamiliar with reading, using, and printing your patterns, I hope this article was a big help to you.

The pattern I've been using for a reference is the So Many Ways Cellphone Case which is available at Etsy and Craftsy.

Here is one more final tip; if you go into the advanced computer settings you can choose to print in DRAFT mode. This is where your computer will print while using the least amount of ink possible to do the job. I used to do this but now I use the HP Instant Ink Program where I'm charged by the amount of pages I print instead of the amount of ink I use. I suppose that is a tip in itself and well worth it if you have an HP printer. I save a fortune on ink! Just printing out my photos used to cost a fortune, but no more!

Thursday, May 7, 2015

Apps to Make Your Creative Life Easier


I have to say that smartphones are probably one of the greatest inventions of all time. I use mine to organize my life! It's so cool to have everything at your fingertips. I have shared some of my favorite apps with you before (links at the end of this post) but the links I'm sharing with you today are the ones I use to make my creative life easier. And did I mention that they are all free?

Plan, Start, Succeed This is a great app for the business crafter. It's full of lots of great information.

Expense Manager Another great app for those who want a super easy accounting system for their business or their personal life. I use this one for both. Love it!

CProject This will keep any project from the smallest to the biggest nicely organized. 

Memento Database Just as its name, this is a great database to keep up with your inventory or supplies! 

Quilting & Sewing on the Go This is a nice app to have for those times when you are at the fabric store and you aren't sure how much fabric to purchase or need other important details pertaining to sewing and quilting.

Shopping List When you realize that you are running low on a supply you can quickly add it to your list for your next trip out. You can keep all your lists on here as well, such as your projects in line, studio "to do's" or even your grocery list.

Evernote I've said it before and I'll say it again, I love, love, love Evernote! You can organize absolutely everything in this program. This program does so much that I can't even begin to explain it in this little post, you'll need to check it out for yourself.

Craftsy If you like to see great instructional videos on the go, this app is for you. You can watch your classes on your tablet or phone while you are working out at home or in the gym.

JoAnn, Michaels, Hobby Lobby These apps are from your favorite shops. They all have great coupons, their sales ads right in your app, and even gives you the location of the nearest store when you are out and about. You can even shop from them!

The above links will take you to the Google Play store (for Android), but if you have another operating system such as for the iphone, you can find these or similar there.

If you have a favorite app for making your creative life easier, please share in the comments!

Monday, April 27, 2015

143 Means I LOVE YOU


Some of you may not know this, in fact I didn't know it myself until my husband told me the story about it. He even bought me little earrings that are stamped with 143. Last Christmas he made me the wooden block that you see in the photo and it's one of my favorite gifts ever!

There is a beautiful story behind the 1-4-3 about a lighthouse. Every day, Minot’s Ledge Lighthouse blinks “I Love You” to Lighthouse Lovers by using a 1-4-3 flashing sequence which is the same numerical count as the words “I love you.” The lighthouse carries the nickname, the “Lover’s Light” or the “I Love You Light.”

On November 15, 1860, Fitz James O’Brien’s “Minot’s Ledge” poem was published in Harper’s New Monthly Magazine. There are also great stories of hauntings from this romantic lighthouse. I found this great article explaining it in much better detail than I have here:

https://lighthousestars.wordpress.com/2008/02/14/minots-ledge-i-love-you-lighthouse-143


The mug rug pattern shown above can be purchased at my Etsy Shop or my Craftsy Shop.

Tuesday, April 7, 2015

Organizing Your Time


If you search through my blog you are sure to find some great organizational tips to keep your creating space clutter free and you'll know where everything is. I haven't touched on how to organize your time. This isn't just for your hobby or business, everyone can get get more done with a little organization! I'll share some of my tips and techniques. Some will work for you, some may not, so do whatever works for you.

Let's start with calendars. Some people prefer to use a paper calendar and I was the same way until recently. I'm also the type of person who not only hates clutter, but also I like travel (day to day) very light. I like the Samsung calendar that comes with my phone. I can sync it with my Google calendar. Works very well for me. Paper or electronic, find one that works for everything and if you have a business, you'll want one that will merge the two events so you only have to go to one place. I love the color coding for events and tasks as well.

Where to store all your general (and non general) data? This is where I find that Evernote does the best job ever! I keep my trips organized, my business information, addresses, websites, various notes, and even recipes. You can create various "notebooks" and each notebook can have several cards or pages. This thing just does so much, I don't know where to begin. It's best for you to just check it out and see for yourself. And yes, it's FREE! There are several apps and websites out there, and I've tried several, but once I discovered Evernote, I quit looking.

List, lists, and more lists. I am a list maker! It just feels so good to cross off items as you complete them. Before I used the electronic apps I used the old fashioned paper and pencil, and you should use whatever works for you. There are so many apps out there if you want the electronic version, again, find what works for you. Other than the usual grocery lists and packing lists, I like to keep some To Do lists as well.

TODAY: I always have a "TODAY" list in all caps of course. On my app I always have a list with the name of the day of the week, although I don't get too far ahead of myself. If I absolutely don't want to forget a task, I'll put it on my calendar then add it to my list the night before. This is an important list because this is how I make sure my stuff gets done for that day. I use the same list for business and personal. If for some reason I don't get a task finished, I'll add it to the next day.

WEEKLY or MONTHLY: These are nice lists to have and are good for big projects, or things that you need to get done that month. You can move these items to your daily list when you can fit it into a certain day.

"WHEN LISTING" LIST: I know this sounds silly but when you know why I call it that, it will make sense. When I first list a new pattern, there are various steps that I don't want to forget, so I create a list of things to do at that time. For example, before I list an item, I proof it, prepare display images, turn it into a PDF document, add it to my items inventory list, introduce it on Instagram, etc.... There are actually about fifteen things I do when I first list a new pattern or clipart set.

I also have other lists where I like to use Excel spreadsheet. An important one is my "Shop Check Off List." Between my graphics and my patterns, I sell at about eight different places. The first two places I list to are Craftsy and Etsy. Then I spread out the other listings throughout the week. It would be too hard to remember what I posted when and where, so I created the spreadsheet so I can have a check off list.

Above are a few ways I like to keep organized. Feel free to share your tips in the comments section. I'd love he hear them!


Tuesday, September 23, 2014

Great Idea for Storing Kitty Litter Bags


Now that I don't use plastic grocery bags anymore I'm finding that the stash I keep for disposing kitty litter is going down awful fast. I suppose that I was actually recycling them, but as much as we shop, they really were getting out of control. Besides, I heard on the radio that they plan to do away with them completely in the next few years. Many places already have quit using them, as many cities in the U.S. have gone green.

I picked up a package of eight rolls of pet disposal bags. They come in a roll so that they fit the nice little holders that people attach to their pet's leash for when they are our walking. That in itself, is brilliant! You know what else they fit beautifully inside? All eight of them fit inside the wet wipes container that you buy in the toilet paper isle at the grocery store. They even have a hole to dispense them one at a time from the rolls, and a cover that flips over so you don't see what's inside. I personally like this idea because Punkie likes to eat plastic bags. This way, she can't get to them, and I can keep this in the bathroom where I keep her main litter box. 

If you are going green in your home and plan on not using plastic grocery bags, be sure to check out my blog tutorial to make some foldable grocery bags that fit inside a sleeve. They are so easy, even if you don't sew. I was actually told by one reader that it was her first ever sewing project and it turned out great! You can find that HERE.


Sunday, March 2, 2014

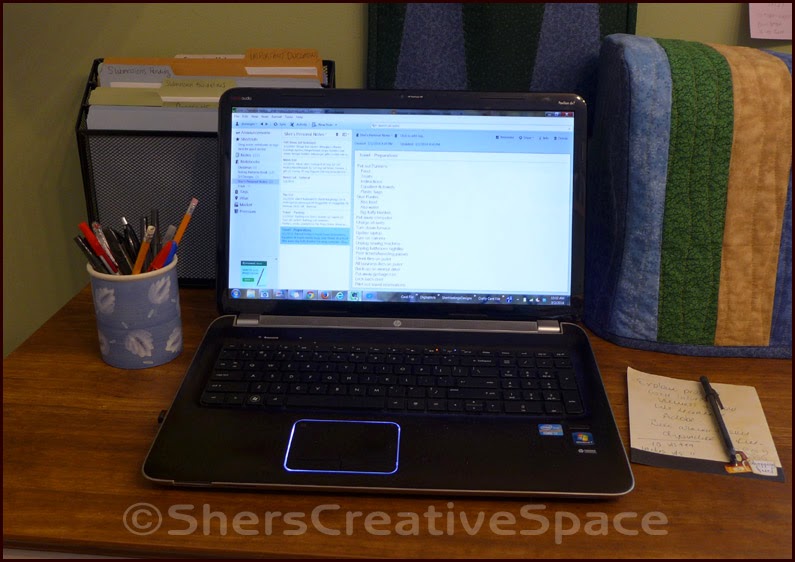
Tip - Evernote Can Be Your Best Friend!

evernote, tips,

I am in love with Evernote! I'm even filing this post under "Tips & Such" because it's such an awesome program and will be a big help in organizing your personal life as well as your business life.

For the past ten years I've been using another program for these types of notes but I'm now switching all those notes over to Evernote. As much as I liked the other program, it doesn't sync with any of my other devices. I can only use it on my computer. Plus, this program has a lot more features than my previous program.

It's so simple to learn too. You can customize your workspace any way you want. You will create "notebooks" for the various subjects you want to organize. In each notebook, you create as many notes as you need. For example, I have a "notebook" for organizing my future blog posts. Each "note" is the title of that post, then that is where I put notes, drafts, images, etc, that will be used for that post. This is a great tool for writers.

Evernote also syncs with my cellphone, tablet, and computers. They just now released a computer platform that you can download so that you don't have to have Internet access to use it! So you can work on your stuff offline, they sync when you have an Internet connection. If you are borrowing someone's computer, you can still get to your notes by logging onto their website.

I would suggest all my readers give it a look. They have a free version as well as a paid version. The free version could be all that most people would need. If you want the paid version, you can earn points toward free months or storage space by inviting friends to try it out.

Seriously, I can't say enough good things about this program. If it can't keep your paperwork, journals, recipes, notes, inventory, or anything else in order, nothing will! Click HERE for more information.

Friday, February 21, 2014

Sewing Tip - Try New Things, A Lot!

sewing tip, try new things, try new colors

Try something new. About once or twice a month, try a new technique or a new product. This is something I have been doing for the past year. I have since learned so many new things, and have found some great products that wowed me, as well as some that I will never use again. But I'm glad I tried them all!

One of the things I tried recently was to really experiment with color. I went to the fabric store one day and bought about twenty yards of brightly colored fabrics, then came home and started using them! I used to stay in my blue/green comfort zone, until I found out how fun it was to use bright yellows, oranges, and lime greens. Now my fabric wall has about every color imaginable!
Related Posts Plugin for WordPress, Blogger...